This article is a practical guide to use the SPI bus available on the CORE9G25 boards. To have a more in depth idea of how the SPI works in Linux please read the Kernel documentation on:
The Serial Peripheral Interface bus or SPI bus is a synchronous serial data link standard that operates in full duplex mode. Devices communicate in master/slave mode where the master device initiates the data frame. Multiple slave devices are allowed with individual slave select (chip select) lines.
The signal available on the CORE9G25 boards depends from the Kernel and the CPU used.
This table contains the list of SPI signals enabled by default on the CORE9G25 Boards:
| SPI Signal | I/O | Function | Daisy-1 | CORE9G25 | SAM9G25 |
|---|---|---|---|---|---|
| MOSI | O | Master Output Slave Input | D7.2 | S11 | PA12 |
| MISO | I | Master Input Slave Output | D7.3 | S12 | PA11 |
| SCLK | O | Slave Clock | D7.4 | S10 | PA13 |
| CS0 | O | Chip Select 0 | D7.5 | S9 | PA14 |
Using the default Kernel configuration just one SPI chip select signale is available. Changing the basic Kernel configuration it is possible to enable more CS.
| Signal | I/O | Function | CORE9G25 | SAM9G25 |
|---|---|---|---|---|
| CS1 | O | Chip Select 1 | S16 | PA7 |
| CS2 | O | Chip Select 2 | S22 | PA1 |
| CS3 | O | Chip Select 3 |
Using the SPI bus
A driver called spidev is provided by the Linux Kernel to manage the SPI bus from user space.
Signal timing
As stated before the SPI mode is an important parameter that should be trimmed according to your slave device and in accompliance with the modes available here.
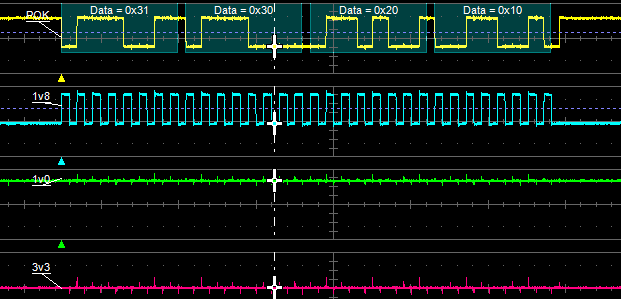
Now follow some graphs of the spidev behaviours captured with an oscilloscope. In the following images the cyan trace is the SCLK signal, the yellow trace is MOSI signal and at the end the green trace is n-th CS.
Spidev on CS0
The trace below was captured using the following Kernel definition:
    {
        .modalias    = "spidev",
        .chip_select    = 0,
        .max_speed_hz    = 1000000,
        .bus_num    = 1,
        .mode = SPI_MODE_3,
    },
and the following command:
echo spi0 > /dev/spidev1.0
Note that the training char in the captured image is a carrier return introduced by echo.

Spidev on CS1
The trace below was captured using the following Kernel definition:
    {
        .modalias    = "spidev",
        .chip_select    = 1,
        .max_speed_hz    = 1000000,
        .bus_num    = 1,
        .mode = SPI_MODE_1,
    },
and the following command:
echo test > /dev/spidev1.1* command as spidev writer.
Note that using a mode1 the behaviour of clock signal is different.

Spidev on CS2
The trace below was captured using the following Kernel definition:
    {
        .modalias    = "spidev",
        .chip_select    = 2,
        .max_speed_hz    = 1000000,
        .bus_num    = 1,
        .mode = SPI_MODE_3 | SPI_LSB_FIRST,
    },
and the following command:
echo -n spi2 > /dev/spidev1.2
Note that in this final capture the mode is the binary OR of more than one flag defined inside spi.h kernel header. The captured traces show also that the byte-ordering is inverted due to SPI_LSB_FIRST flag and also that only 4 char are sent on the bus due to the -n option of echo command that supprime the carrier return.

Related links
Documentation Terms of Use
The Acme Systems srl provides this Debian system development and user manual.
The origin of these doc came from the website: http://www.acmesystems.it
This work is licensed under a Creative Commons Attribution-NonCommercial-ShareAlike 3.0 Unported License.


 微博
微博
